Daily Tasks Guide - How To Do Daily Tasks
- How to upload a project
- How to Start or Create a New Project | Step-by-Step SOP
- How to transfer a website
- How to close a project
- How To Get Review From Review Left Client & Update it Properly
- SOP – Handling & Uploading Client Changes (Revisions)
How to upload a project
-
Create a new project on ClickUp with the name of the client Name with Country Like Name (Country)
-
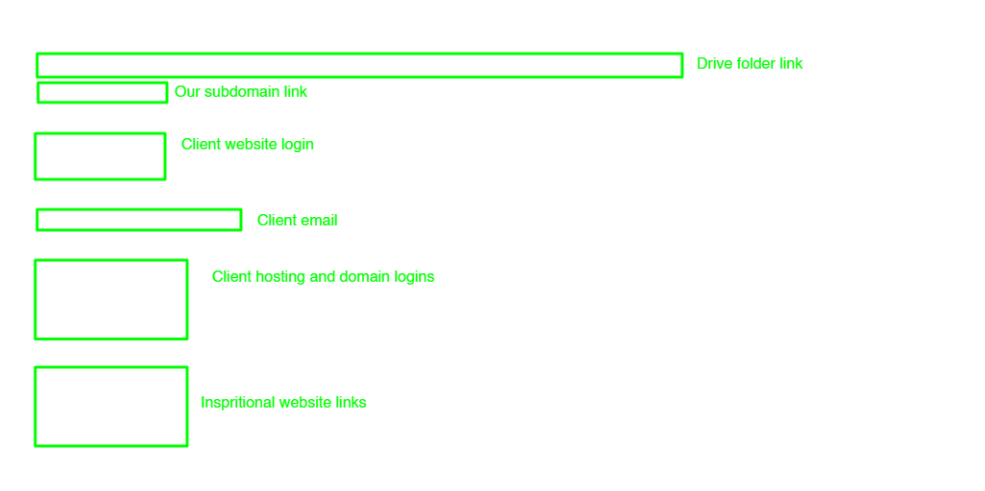
Create a folder with the client name in this account drive (smtp…) and paste this folder link to the click-up description section as shown in the photo.
-
Take screenshots of all chats of the client bout conversion and order chat download and download all the images, videos, and files from the client chat.
-
Upload all the data to the drive must use this account (SMTP…) when uploading the data to the client folder.
-
Create a subdomain with the same name that we use for click-up and paste links in the clickup description section as shown in the photo.
-
Upload client logins to the Client Login list.
-
Upload client inspirational website links at the bottom of the click-up description as shown in the photo.
Note: Use the same format in the description section whenever uploading the project. As shown in the photo.
-
Send all the important links to the Discord Activity section that are difficult to copy from screenshots and other important links.
-
Send if have done meeting. all the meeting links to the Discord Activity section.
-
Update the order date on ClickUp if the order is in progress.
-
Set the priority tag with the help of the Order Tag SOP’s.
Changes the status of that project with the help of Order Status SOP’s.
How to Start or Create a New Project | Step-by-Step SOP
Purpose
This SOP outlines the step-by-step process for uploading a new client project. It ensures that every project is properly documented, organized, and tracked from the beginning, maintaining consistency and data security across all team members.
1. Requirements Checklist
Before starting the project upload process, make sure you have collected the following items from the client:
-
✅ Inspirational Website(s) (reference links or design examples)
-
✅ Logo (in PNG, SVG, or vector format)
-
✅ Content (text, images, and any brand material)
-
✅ Login Details (WordPress, hosting, domain, or cPanel)
-
✅ Total Pages and Their Names (complete sitemap if available)
-
✅ Any Specific Notes (special requests, colors, fonts, or functionality)
Ensure all of these materials are complete before proceeding.
2. Project Uploading Steps
Step 1: Create a New Project in ClickUp
-
Open ClickUp and create a new task/project.
-
Use the following naming format:
Client Name (Country)
(Example: John Smith (USA)) -
Add the project under the appropriate workspace or list (e.g., “Active Projects”).
Step 2: Create a Folder in Google Drive
-
Log in to the official SMTP Drive account (company-managed Google Drive).
-
Create a new folder using the same name as the ClickUp project.
(Example: John Smith (USA)) -
Copy the folder link and paste it in the ClickUp Description section — as shown in the reference photo.
-
This folder will contain all client files, media, and communication records.
Step 3: Collect and Upload All Client Data
-
Take screenshots of all client chats, including conversion and order chat.
-
Download all images, videos, documents, and other files shared by the client.
-
Upload everything to the client’s folder in the SMTP Drive account.
-
Double-check that all files are uploaded correctly and organized in labeled subfolders (e.g., “Logo,” “Content,” “References”).
Step 4: Create a Subdomain for the Project
-
Create a new subdomain using the same name used in ClickUp.
(Example: johnsmith.youragencydomain.com) -
Upload the project files or WordPress installation to this subdomain.
-
Paste the subdomain link in the ClickUp Description section below the Drive folder link (as shown in the reference photo).
Step 5: Add Client Login Details
-
Add the client’s login credentials (WordPress, hosting, or domain) to the Client Login List spreadsheet or document.
-
Ensure the credentials are stored securely and accurately.
Step 6: Add Inspirational Website Links
-
At the bottom of the ClickUp description section, paste the inspirational website links shared by the client.
-
Follow the same structure shown in the reference photo to maintain consistency.
Step 7: Update Discord Activity Section
-
Go to the Discord Activity channel.
-
Send all important links that are difficult to copy from screenshots (e.g., Drive folder, subdomain, or project file links).
-
If a meeting was held with the client, also send the meeting link and notes to the Discord Activity section for tracking.
Step 8: Update Project Information in ClickUp
-
Update the order date in ClickUp if the order is still in progress.
-
Set the priority tag following the Order Tag SOP.
-
Update the status of the project according to the Order Status SOP.
Important Notes
-
Always use the same description format inside ClickUp as shown in the reference image.
-
Ensure all uploaded materials are stored under the official SMTP Drive account only.
-
Maintain a professional and organized structure for every project — no personal accounts or local storage should be used.
-
Double-check all links (Drive, subdomain, etc.) before marking the project as uploaded.
How to transfer a website
Subdomain
-
Step1-Delete plugin Envato elements Also save the template kit name to ClickUp
-
Step2-Checking favicon
-
Step3-Tick the Checkbox from Setting -> Reading Settings -> (Discourage search engines from indexing this site)
-
Step4-Back-up (All-in-One WP Migration)->file->Export->download
Client website
-
Step 1- (If the website is shown )Then Back-up (All-in-One WP Migration)->file->Export->download (If not any website on the client website then not necessary to make a backup)
-
Step 2- Upload and Install (All In One Migration) plugin Note: Here use (ALL IN ONE 100GB) that we saved on our computer
-
Plugins Name-(Big File Uploads)
-
Step 4- Import the file that we download from our subdomain
-
Step 5- Refresh and log in again with the username and password that was our Sundomain has (Marshal@007)
-
Step 6- Update permalinks from the setting
-
Step 7- UnTick the Checkbox from Setting -> Reading Settings -> (Discourage search engines from indexing this site)
-
Step 8- Checking in incognito if not loading images or pages may be a case issue ( how to solve: install the plugin (file manager) delete file htaccess and then update Permalinks from setting It will be working)
-
Step 9- Checking Email from the contact form page and change all our email using clients' email --- from -> Setting-> ( by using this address after URL eg, ---https://abc.com/wp-admin/options.php---
-
Step 10- Delete all the extra Plugin, themes, posts, and pages from the trash
-
Step 11- Installing security plugins ---> Wordfence, Enhancement, Itheme, wp-limit, Yoast SEO, and SMTP (only website that has contact form install smtp)
-
Step 12- Update on ClickUp changes status and add tag name Transfer
-
Step 12- At the time when we send login to the client add a new user and password
How to close a project
Project closing steps:
-
Confirm Login Details are saved (client website list) and make sure sent to client... Login Details
-
Make AllInOne Backup from the client's website and delete (All In One Plugin) If Clinte has changed the Login Make a backup from our subdomain
-
Send backup to the client if the Review is done else save it on the computer and send him after the review time, which is 30 days. And assign a label (review left) to that client
-
Changes labels on Fiverr As to (Marshal)
-
Delete the Subdomain but first confirm you have made a backup of this same website may be from the client domain
-
Change the label to close on Clickup.
Client Website Logins List Elementor Client List
How To Get Review From Review Left Client & Update it Properly
SOP – Handling & Uploading Client Changes (Revisions)
🎯 Objective
Ensure all client-requested changes are:
- Properly documented
- Safely stored
- Clearly communicated
- Correctly tracked in ClickUp
No data loss. No missed instructions. No confusion.
🧱 Scope
Applies to:
- All Fiverr website projects
- All revision / change requests (1st, 2nd, 3rd… onwards)
⚠️ Core Rules (Non-Negotiable)
- ❌ Never overwrite old files
- ❌ Never rely only on chat memory
- ❌ Never skip screenshots
- ✅ Every change request must have its own folder
🧭 Step-by-Step Process
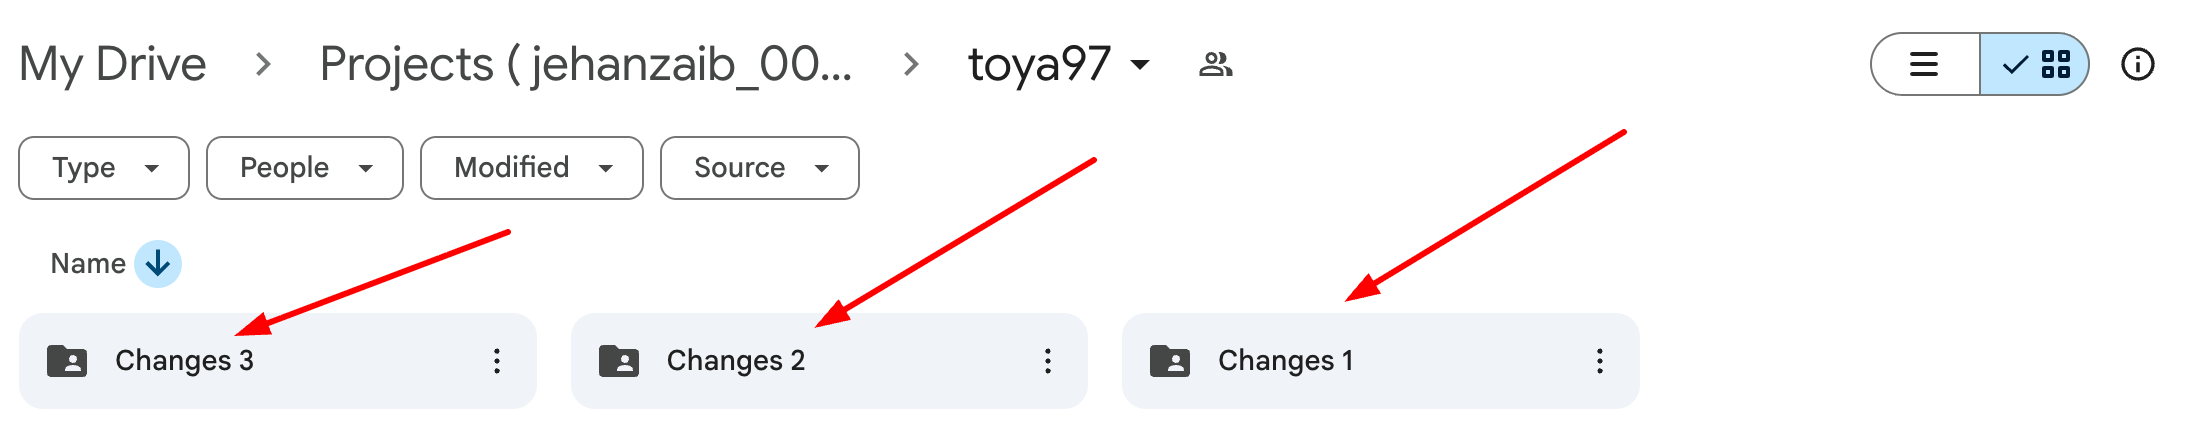
🔹 Step 1: Create Changes Folder (Mandatory)
In the project Google Drive:
- For first revision:
changes_1
- For second revision:
changes_2
- Continue sequentially:
changes_3, changes_4 …
🚫 Never rename or reuse an old changes folder.
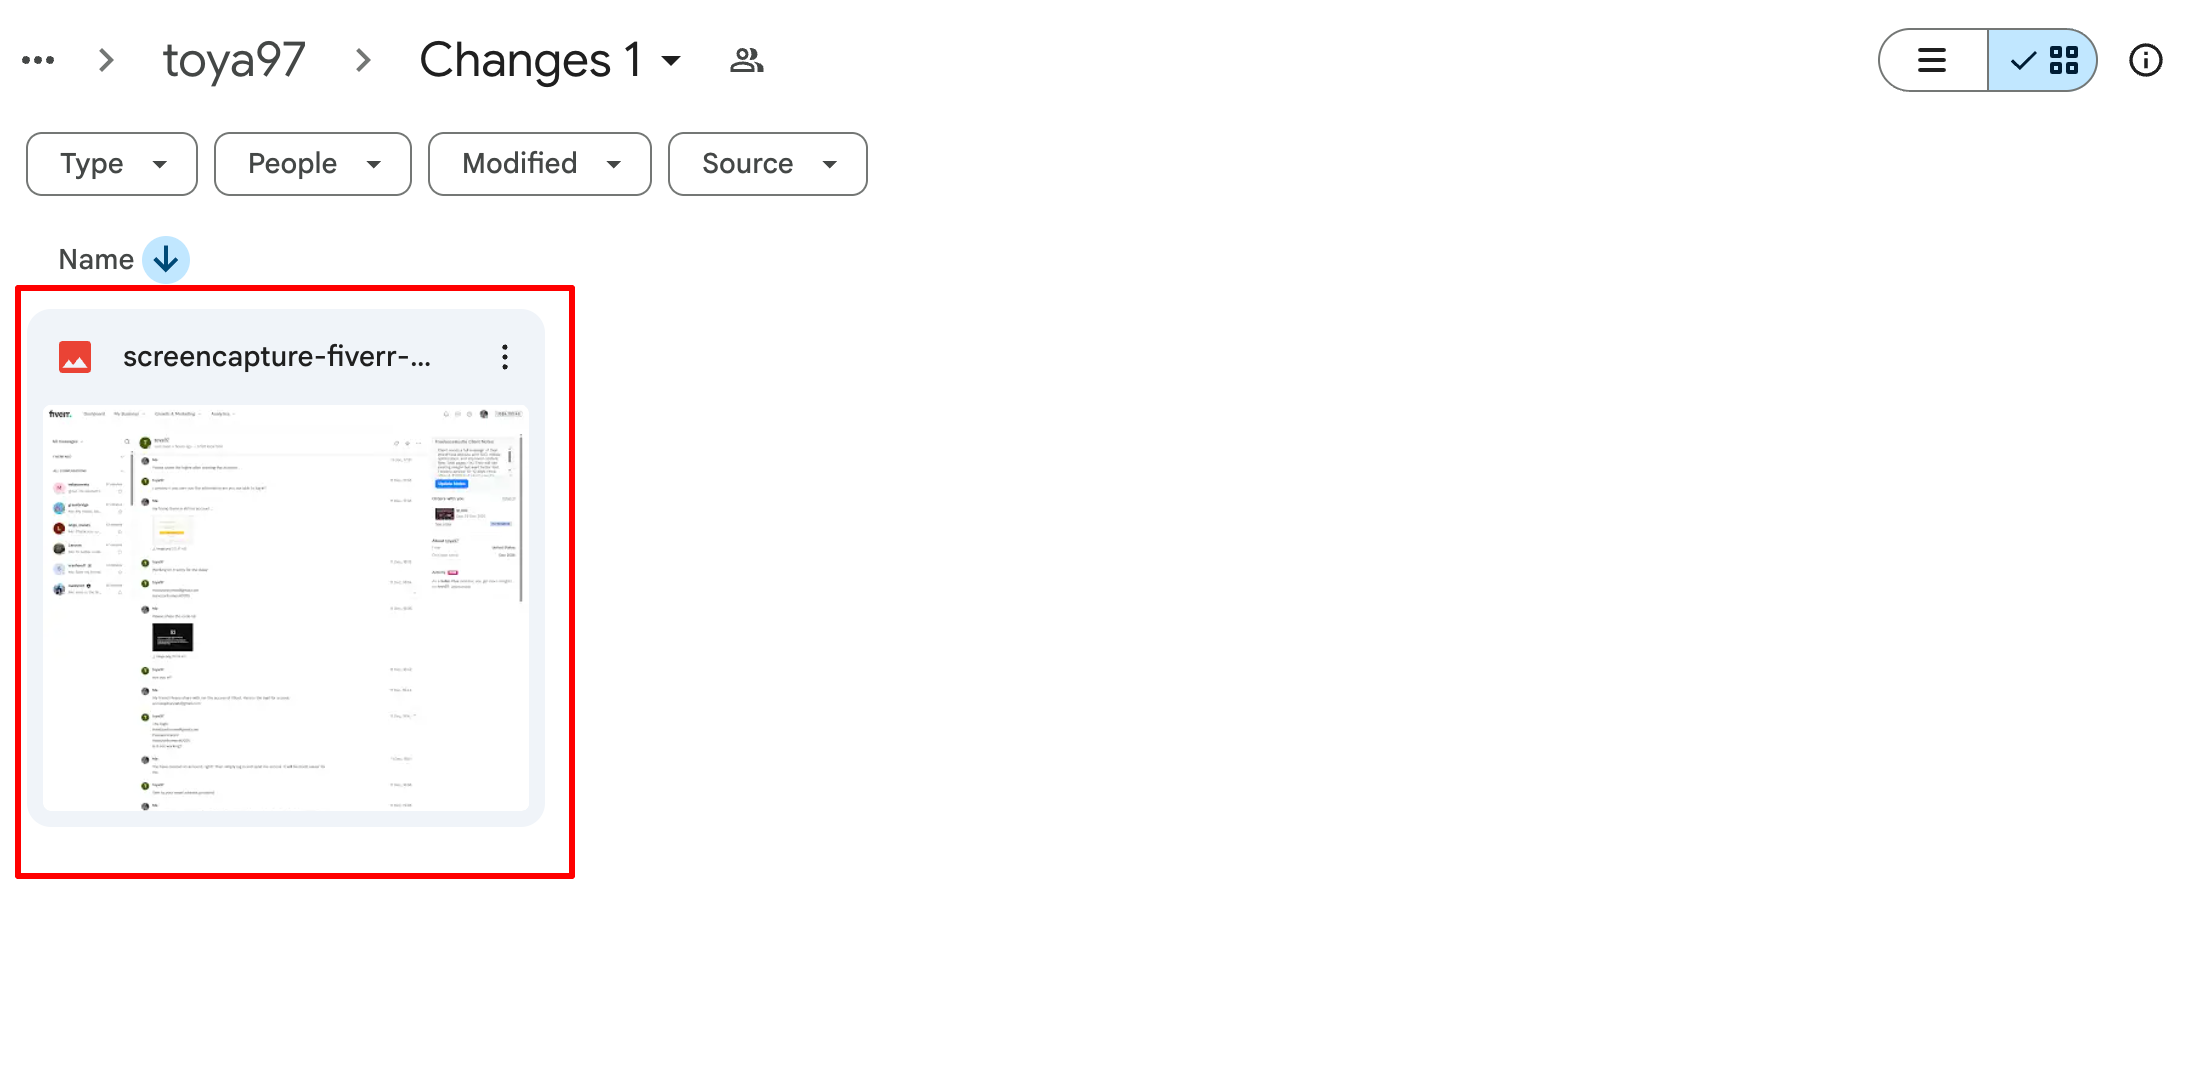
🔹 Step 2: Capture Client Messages (Proof Required)
Take screenshots of:
- Fiverr Order Chat
- Fiverr Inbox / Conversation Chat ( Using Go Full Page Extension. )
These screenshots must clearly show:
- Client instructions
- Date & time
- Any links or files mentioned
📸 Screenshots are mandatory even if the message is “simple”.
🔹 Step 3: Download All New Client Data
Download everything the client sent, including:
- Images
- PDFs
- Docs
- Links (save in a text file if needed)
- Voice notes (if any)
🚫 Do NOT rely on external links staying active.
🔹 Step 4: Upload Data to Changes Folder
Upload the following into the relevant changes_X folder:
- All downloaded files
- All chat screenshots
- Any notes or clarifications (if required)
Upload using the Upastra Drive And client folder only account only
(no personal accounts allowed).
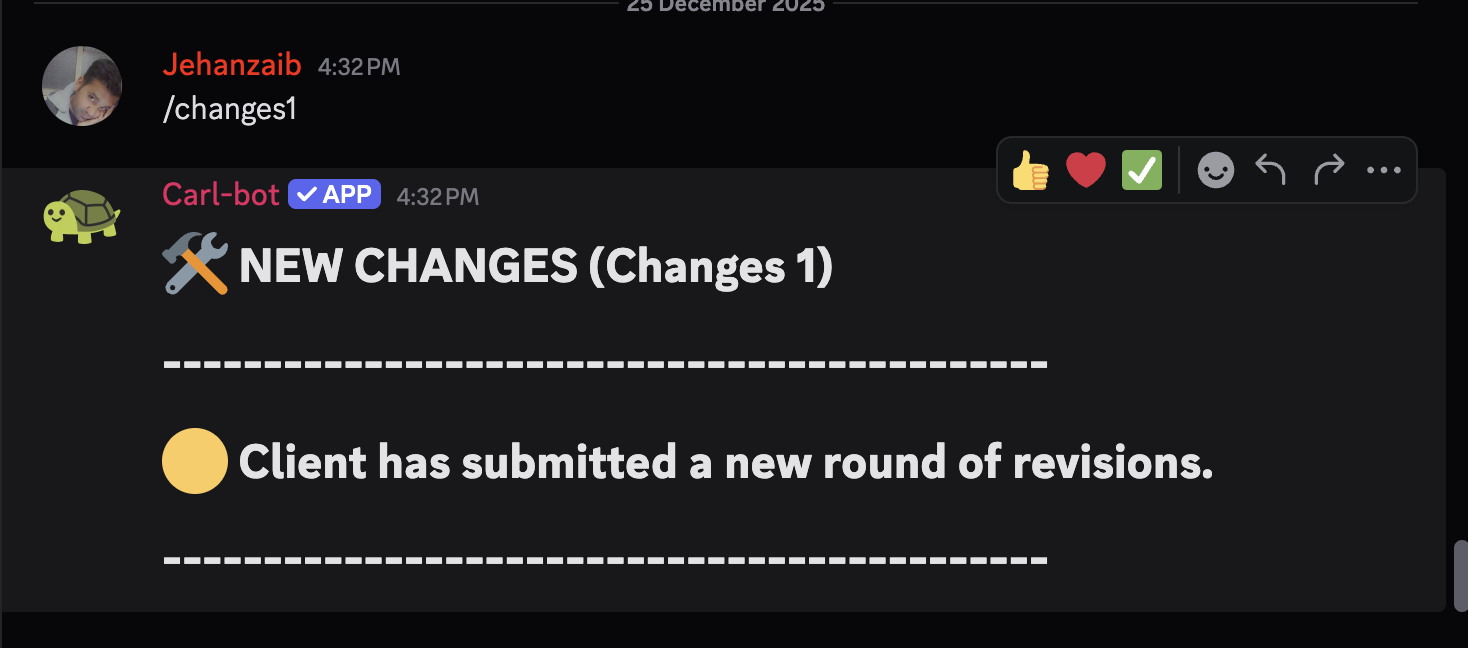
🔹 Step 5: Discord Update (Carl-bot – Mandatory)
In the client’s Discord thread → Activity section:
- Use Carl-bot quick commands only
- Do NOT type manual messages
Use the command matching the change round:
/changes1 → First round
/changes2 → Second round
/changes3 → Third round
…
/changes10 → Tenth round
📌 Carl-bot already contains predefined messages.
Rules:
- Command number must match the Drive folder (changes_1, changes_2, etc.)
- Always use the next sequential command
- Never reuse or skip a number
🚫 If a change round is not logged via Carl-bot, it is not considered an official revision.
🔹 Step 6: Update ClickUp Activity
In the ClickUp task → Activity / Comments section:
- Add a short update: Changes : 1 , Changes : 2
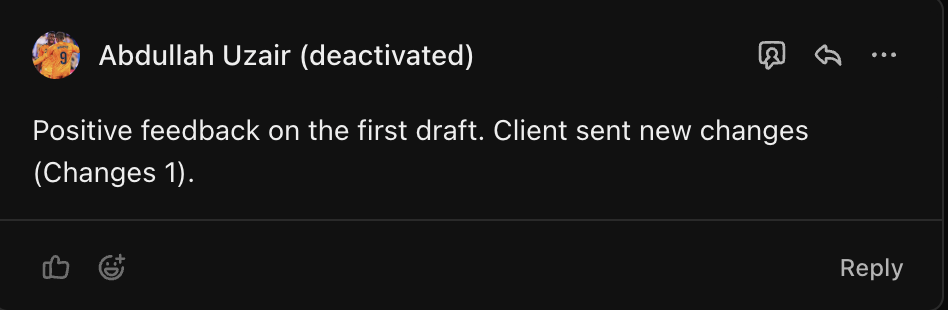
Note: For First draft reply also add the positive, negative or moderate feedback from the client based on the client messages.
🔹 Step 7: Update Project Status
Finally:
- Change the task status to:
New Changes
🚫 Do not move the status before all previous steps are completed.
🔍 Quality Check (Before Status Change)
Confirm all are done:
- - Changes folder created ✔
- - Screenshots taken ✔
- - Data downloaded ✔
- - Files uploaded ✔
- - Discord updated ✔
- - ClickUp updated ✔
If even ONE item is missing → stop.